IN THIS GUIDE
GUIDE · RENOVATION · SLAB TO SILICONE
Bathroom renovation tiling, stage by stage
A renovated bathroom looks like a tiling job. Underneath, it’s a sequence: each layer has to be finished and ready before the next one goes on. Get the order right and the finish holds. Rush a stage or swap two around, and the fault stays hidden until water finds it.
For renovations in Malvern, Malvern East, Armadale, Glen Iris and the suburbs nearby.
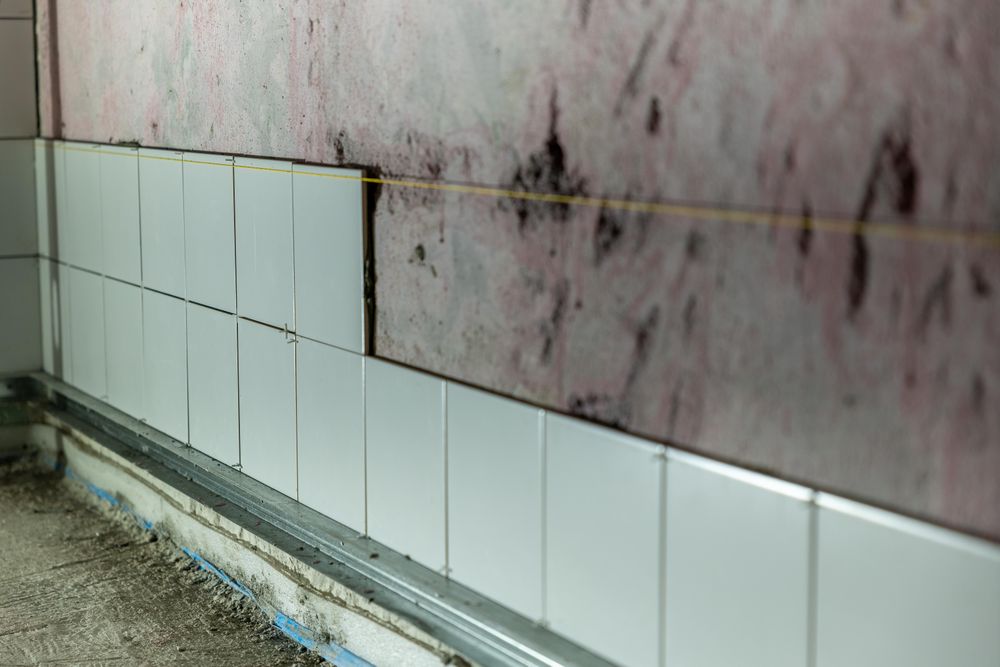
REFERENCE PHOTOGRAPH · WALL PART-TILED, SUBSTRATE STILL EXPOSED ABOVE
The line where tile stops and bare wall begins is a renovation in one frame. Everything below it had to be ready first.
01 · SEQUENCE
Six stages, in the order they have to happen
STAGE 01 · BACK TO FRAME
Strip-out and inspection
Old tiles, bedding and sheeting come off back to the frame or slab. This is the first real look at the room. Rotted timber, cracked screed or old leak damage shows up here, and the plan changes before anything new goes on.
STAGE 02 · SUBSTRATE
Substrate repair, new sheeting and screed
Damaged framing is repaired, walls are sheeted with wet-area board, and the floor is screeded so it falls to the waste. Flatness gets set at this stage. Tile can’t fix a bowed wall or a floor that holds water.
STAGE 03 · PRIMER
Priming
Primer seals in dust and gives the membrane something to grip. Skipping it, or coating a surface that’s still damp, is a common reason membranes lift later.
STAGE 04 · MEMBRANE
Waterproofing and cure
STAGE 05 · ADHESIVE BED + TILE
Floor and wall tiling
STAGE 06 · 0 MM · SURFACE
Grout, trims and silicone
Once the adhesive has set, joints are grouted and cleaned and trims finish any exposed edges. Flexible silicone goes wherever two surfaces meet: corners, floor-to-wall joints and around fixtures. Grout in those spots cracks as the building moves.
02 · INTERFACES
Where the tiler depends on other trades
The plumber
Rough-in positions for the waste, mixers and shower rose are set before sheeting goes up. A floor waste at the wrong height gives the screed nowhere to fall to. Fit-off comes after tiling.
The plasterer
Where tiles stop part-way up a wall, the plaster above and the tile edge need to finish flush. Agree who works where and in what order, so dust and sanding stay away from fresh joints.
The glazier
Shower screens are measured off the finished tile, not the frame, so the glazier comes last. Panel positions still need confirming early, so that fixings and any hob or channel suit the layout.
03 · BEFORE STRIP-OUT
Selections to lock in early
Each of these shapes work that’s built long before you see it.
Wall and floor tiles, ordered with extra for cuts and a few spares kept for future repairs.
WASTE
The floor waste type. A linear channel changes how the whole screed falls.
NICHES + FIXTURES
Niche sizes, tapware, vanity, toilet and screen positions, ideally sized to fit whole tiles.
FINISHES
Grout and silicone colours, and the trim finish for any exposed edges.
Change one of these after the sheeting is up, and a finished stage may have to come back out.
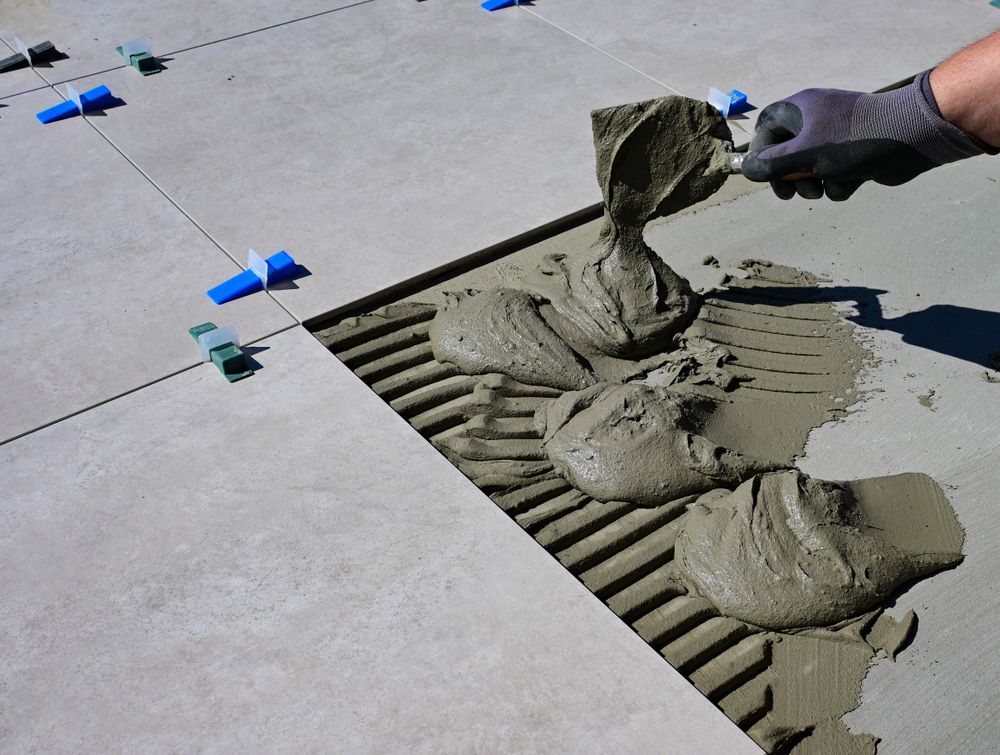
REFERENCE PHOTOGRAPH · NOTCHED TROWEL COMBING ADHESIVE ON A PREPARED FLOOR
04 · WHERE TIME GOES
The usual causes of delay
Late tile deliveries
If tiles arrive after the membrane has cured, a prepared room just sits there. A short order can also mean a second batch in a slightly different shade. Get the stock on site and check batch numbers before strip-out.
Unexpected substrate damage
No one can see inside a wall until it’s opened. Rot or old leak damage found during strip-out has to be repaired before any other work carries on.
Rushed drying times
Screed, primer and membrane all need time to dry or cure. Tiling over a layer that isn’t ready doesn’t save time. It just pushes the failure to a date after everyone has left.
CONTINUE
Related reading and services
SERVICE Waterproofing
SERVICE Bathroom Tiling
GUIDE What drives bathroom tiling costs